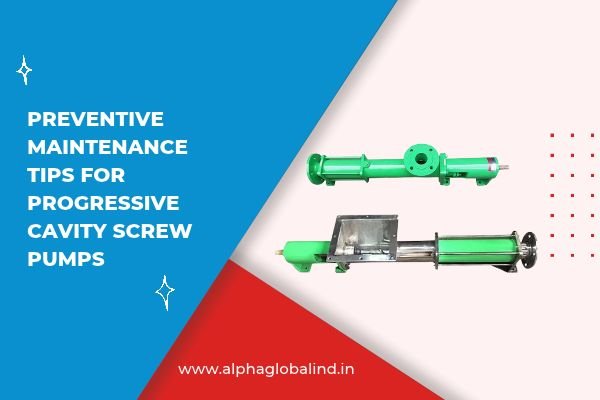
Across industrial wastewater treatment facilities, chemical processing plants, and paper mills throughout Gujarat’s manufacturing hubs—such as the active estates in Vatva, Odhav, and GIDC Naroda—progressive cavity (PC) pumps handle some of the most challenging pumping applications.
Unlike kinetic centrifugal pumps that rely on fluid velocity, a progressive cavity pump operates via positive displacement. A metallic, single-helix rotor turns eccentrically inside a resilient, double-helix elastomeric stator, creating moving sealed cavities that push heavy, viscous materials forward.
Because the rotor and stator operate in constant contact, maintaining tight interference seals, this pump type requires a disciplined preventive maintenance strategy. Neglecting baseline maintenance leads to severe stator degradation, shaft misalignment, and sudden system shutdowns.
Here is an actionable engineering guide to implementing a preventive maintenance routine for your progressive cavity pumps.
1. Master Dry-Run Protection: Eliminate Stator Burnout
[Rotor-Stator Frictional Interface]

         ==============================================
         |  Elastomeric Stator Wall                   |
         |  ........................................  |  <-- Fluid Film (Lubrication & Cooling)
         |  ======================================    |
         |  | Metallic Chrome-Plated Rotor       |    |
         ==============================================
         Zero Fluid = Rapid Thermal Breakdown of Rubber Matrix
Engineering Best Practices for Dry-Run Prevention:
- Install Thermal Stator Sensors: Integrate a Resistance Temperature Detector (RTD) directly into the wall of the elastomer stator. If the temperature spikes past safe limits (indicating a loss of liquid film), the sensor trips the control panel to shut off the motor instantly.
- Flow Assurance Switches: Position ultrasonic or thermal dispersion flow switches on the suction line to verify that liquid is physically present before allowing the motor starter to engage.
- Always Pre-Fill on Startup: Never start a dry, newly installed, or long-idle progressive cavity pump. Manually prime the pump casing with process liquid to ensure the rotor-stator interface is thoroughly lubricated before hitting the start button.
2. Monitor Rotor-Stator Wear and Compression Fit
Preventive Wear Check Matrix:
- Track Flow vs. Pressure Curves: Measure discharge flow rates monthly at standard operating pressures. A 10% to 15% drop in output flow at constant RPM indicates widening rotor-stator clearances.
- Dimensionally Inspect the Rotor: When servicing the pump, use a micrometer to measure the rotor diameter at several points along its helix. If the hard chrome plating has worn away exposing raw steel, or if the rotor diameter has decreased beyond manufacturer tolerances, replace or re-chrome the rotor.
- Inspect the Stator Wall: Look inside the stator for tearing, pitting, swelling, or chemical degradation. If the elastomer feels soft, sticky, or brittle, the process fluid may be attacking the rubber compound, requiring an upgrade to a more compatible material (such as swapping NBR for EPDM or Viton).
3. Maintain Drive Train Alignment and Universal Joint Seals
The motion of a progressive cavity pump requires transforming the simple rotation of a drive motor into the eccentric, wobbling motion of the rotor. This motion is accommodated by two universal (cardan or pin) joints housed inside the suction casing.
[Progressive Cavity Drive Train Assembly]

     [Drive Shaft] ----> (Cardan Joint A) ----> [Connecting Rod]
                                                        |
                                                        v
                                               (Cardan Joint B) ----> [Eccentric Rotor]
- Protect the Joint Pin Sleeves: The universal joints are encased in protective flexible rubber boots or sleeves filled with grease. Inspect these boots during every scheduled maintenance stop. If a boot tears, abrasive slurry enters the pin joint, grinding down the pins and causing catastrophic drive train failure.
- Laser Alignment: Ensure the main drive motor, gearbox, and pump shaft are precisely aligned using laser tools. Shaft misalignment subjects the drive shaft and mechanical seal to heavy radial forces, causing premature seal weeping and bearing failure.
4. Scheduled Preventive Maintenance Checklist
| Maintenance Frequency | Inspection Target | Corrective Action |
| Daily | Mechanical Seal / Packing Gland | Check for excessive weeping; ensure gland nuts are adjusted evenly. |
| Weekly | Temperature & Vibration | Check bearing housing and stator temperatures; log vibration levels. |
| Monthly | Universal Joint Boots | Inspect flexible rubber covers for tears, fluid leaks, or cracks. |
| Quarterly | Laser Shaft Alignment | Check motor-to-gearbox coupling alignment; torque foundation bolts. |